Restoration Guide for LVT Flooring
Luxury vinyl tiles are an elegant option for many commercial and domestic projects. This restoration guide for LVT flooring will answer all of your burning questions associated with LVT flooring, before offering you tips and tricks when it comes to maintenance and restoration.

LVT Flooring Frequently Asked Questions
What is LVT Flooring?
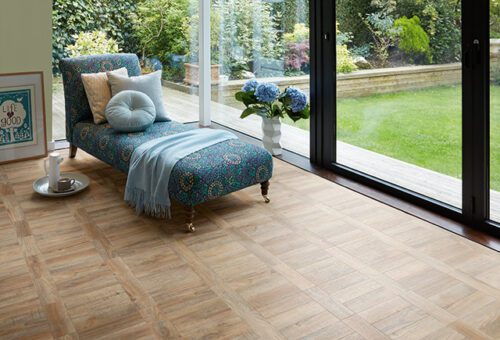
Luxury vinyl tiles add a touch of elegance to your flooring with the realistic look of a wooden or stone floor, whilst being waterproof and resistant to damage. They are the ideal flooring solution for light commercial settings and home interiors, including bathroom and kitchen flooring.
What are LVT Flooring Pros?
- LVT is an affordable alternative to other flooring products
- Made from robust materials, catering for heavy foot traffic, flame resistance and exposure to moisture, LVT is highly durable
- It provides excellent grip and slip resistance making it great for kitchens and bathrooms
- LVT provides a cushioned feel underfoot and is quieter to walk on compared to other types of flooring
- Cleaning LVT is easy, with it being hard wearing you can give it both a light and deep clean. Check out our how to clean LVT flooring guide
- The average lifespan of LVT is 25-30 years depending on maintenance, traffic and location
- It’s difficult to differentiate LVT from hardwood since it has so many quality designs
- Installation is quick and easy, and we have a guide on how to install LVT flooring
- LVT is sold in individual tile packs, so you can simply replace the tile if it becomes damaged, but more on that in our restoration guide!
What are LVT Flooring Cons?
- The quality of the colours can fade over time if placed in direct sunlight. Try keeping any LVT floors shaded by curtains or blinds on particularly sunny days
- Since it is made from plastic, the material is not biodegradable
- While it’s extremely durable, it isn’t totally indestructible. LVT can dent and even scratch or scuff, especially from heavy appliances, furniture, or other weighty objects
Which LVT flooring looks like wood?
There are many types of LVT flooring on the market, with Polyflor being one of the leading manufacturers. Their Camaro Wood Pur range has numerous wood grain styles to choose from.
Can LVT flooring be recycled?
Although it is not biodegradable, some LVT flooring can be chipped and recycled into new products. Just check Recofloor for the material specifications before recycling.
Can LVT flooring be painted?
Yes, but only with the right materials. If you’re looking to revamp your space, use floor paint that’s made to withstand foot traffic. Applying two coats of primer and two coats of paint will help make the finish more impervious. However, it’s not usually recommended and might be better to try a new flooring option or relay.
Can LVT flooring be installed over laminate flooring?
Although you technically can, it’s not advised since the laminate can swell and make the flooring become uneven. It’s best to pull up and lay your LVT flooring on the subfloor. For more information on how to install LVT flooring follow our guide.
Is LVT flooring waterproof?
Yes, in fact, all LVT floors, whether Vinyl Click or glue-down, are fully waterproof. This is what makes it the perfect flooring for kitchens and bathrooms.
When to replace LVT flooring?
The average lifespan of LVT is 25-30 years depending on maintenance, traffic and location. If it’s looking worse for wear or if there’s damage in places, check our guide to luxury vinyl tile restoration or replace your flooring completely.

HOW TO REPAIR LUXURY VINYL TILE FLOORING
If you’ve already used our guide on how to install LVT flooring, you’ll know that the process is simple. But while LVT flooring is surprisingly durable, it doesn’t last forever. It’s not uncommon to spot a rip, tear, or hole in a tile when you’re cleaning up. This can be a frustrating experience, but your LVT tiles can be easily repaired with a few simple tools.
TYPICAL CAUSES OF DAMAGE TO LVT FLOORING
The most common cause of tears in your vinyl is dragging heavy objects with a pronounced point or sharp metal edge across the surface. This can include seemingly innocuous things like tables and chairs, rearranging furniture, dragging boxes of items away for storage, and so on.
HOW TO AVOID DAMAGING YOUR LVT FLOORING
When moving heavy items across LVT, be sure to lift those items rather than drag them along. Not only will this minimise the risk of damaging your floor, but it is also a much safer method of moving heavy items such as furniture. Even if you need help from a friend or loved one, you are less likely to injure yourself by lifting than you are by dragging.
For really heavy appliances like dishwashers and washing machines, you may have no choice but to drag the item into position. You can avoid damaging the floor by laying a plywood path from its start to end positions. Use this as a safe surface to drag your heavier items across, as the only damaged material will be the plywood.
If the items have legs, always use furniture coasters when doing so to avoid these scuffs, but if it does happen, here are some tips to get those tears restored.
HOW TO REPAIR MINOR TEARS
Small rips and tears in your vinyl tiles are easy to repair. You will need a hair dryer, some vinyl floor adhesive, and a pallet knife. Begin by moving the hair dryer gently over the area where the rip is most prominent. What you are trying to do here is melt the adhesive beneath without warping the tile, so take your time.
Once the vinyl can move a little, gently pry both sides of the tear away from the floor, taking care not to damage the tile itself. Apply some fresh adhesive to a pallet knife and slip it between the subfloor and the vinyl, using the knife to spread a layer of glue between them. You need to push both sides of the small tear together so that they form a joint.
With the two sides neatly aligned, you should weigh them down with a suitably heavy object. This will prevent the two sides of the rip from slipping away from one another while you wait for the adhesive to dry. This could be anything from a dumbbell weight to a full tin of paint.
Once dry, apply a vinyl floor sealant as an extra layer of protection to reinstate the water resistance of your LVT floor.
HOW TO REPAIR LARGER TEARS
If the tear is more than just a straight rip, the technique described above will not be sufficient. You’ll need to replace the torn part with a fresh tile. Using a utility knife, cut out the affected tile. The best way to do this is by drawing a line from each corner, to make a triangle and a straight line between both points of the triangle. That way you can cut the tile and peel it away from the floor without damaging the edges. As shown in this video.
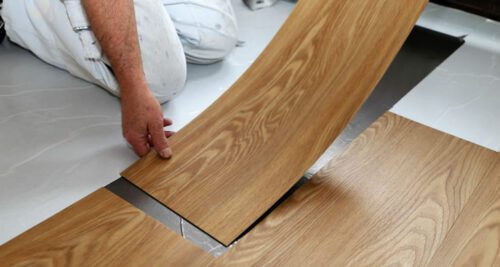
Take a spare tile to fill the gap. If the LVT is patterned, be sure to make it align with the rest of the tiles around it. Apply adhesive to the reverse side of the tile and the subfloor and carefully place in the new tile.
Hold it in place for a few minutes for the adhesive to take effect. During this time, you will be able to make slight adjustments to its position to get it lined up correctly. Once you’re satisfied, put something heavy on top of the tile to hold it in place.
Once dry, apply a vinyl floor sealant as an extra layer of protection to reinstate the water resistance of your LVT floor. It should be fine to walk on within 48 hours.

HOW TO REPLACE AN LVT FLOOR
If you want to replace the entire floor, you will need to pry up the old tiles first. The easiest way to do so is to pour hot water over the floor and leave it for about half an hour. This will melt some of the adhesive holding it in place, making it much simpler to remove.
Any remaining adhesive stuck to the subfloor can be removed with an appropriate solvent, or it can be left to dry and then sanded down. Once the subfloor is ready, you can start installing your new LVT flooring. Follow our step-by-step guide on how to install LVT flooring.
Afloor offers a wide range of LVT flooring, suitable for both commercial and domestic use. Visit our online store today for the latest prices and availability, or call your local branch for tailored advice.
We hope this restoration guide to LVT flooring has answered all of your questions and if you need some top tips on how to clean LVT floors, we’ve got you covered.
